Have you ever been lying in bed at night when all of a sudden, an anxious feeling comes over you because you realize that your digital photos aren’t backed up like they should be? Like what if your phone died tomorrow… and not like your battery just died, but what if it just stopped working and your camera roll was gone? Or your computer. What if you lost everything on it next week? How would you feel? If your heart is as wrapped up in photo memories as mine, losing any of them would be devastating – and that’s a huge understatement.
 So, do yourself a huge favor in 2020 and make this the time when you finally give your mind a break from worrying about losing your digital photos. I’m going to share a few ideas in this post that will hopefully give you a clear path for how to get started. But first, here’s a disclaimer: I am not a tech-savvy girl in any way. To be honest, I dread dealing with things that involve technology. The right side of my brain always trumps the left and if there’s not a clear picture of how to do something easy the first time, then I lose interest pretty darn quick. So, keep in mind that this is not a comprehensive breakdown of all of the technical ways that you can achieve backing up your digital photos. It’s just my account of what I’ve learned, how I keep it simple in my head, and the things that I know would help you out if this is a project you’re looking to accomplish too. So, here we go!
HOW TO BEGIN
The very first thing you need to do when taking on this project is to set some parameters for yourself. The thing is that many of us have SO many photos and in so many different forms, that tackling this project all at once would be overwhelming enough that you’d probably never start. For example, I have an entire plastic bin of printed 4X6 photos from before the digital days (I know… I’m actually that old). Someday I’d love to scan them all and create folders on my computer that I can back up, but to be honest they aren’t the most important thing to me right now. In 2012 I became a mom and pretty much every digital memory from February 6th of 2012 until now means the world to me, so that was my obvious place to start. My goal was to make sure all of my memories from then on would be safe. So, number one – pick a starting point.
Once you’ve made a decision on how you will take on this project, the next best thing to do is to put all of the images that you’ll be working with in one place, on one computer. For me, the two types of photos that I have are digital files from my Canon DSLR camera and then images from my cell phone. So, whenever I gather my digital images together to organize them, I need to combine the two. This might mean transferring folders from one computer to another, or plugging a phone into your computer and pulling images from there. But the idea here is to get everything in one spot. Then, this brings us to the next task which is categorizing.
HOW TO ORGANIZE
For me, it makes the most sense to organize my digital images by months and year. It’s simple, it makes sense in my brain, and I also love to go back and look at things in chronological order. I make digital photo books with my images (something I’ll talk more about in another post), so more specifically I make folders for every three months because that’s how I make my books. But you could totally do folders for every month, every six months, or even every year if you don’t have a ton of huge file size photos. The only time I deviate from this system is when I make a separate folder for a larger event – like a family vacation, where the number of images that I have from that time is significantly more and I feel like it needs its own folder. However you do it, just pick a system and then stick with it so your folders are uniform and easy to navigate.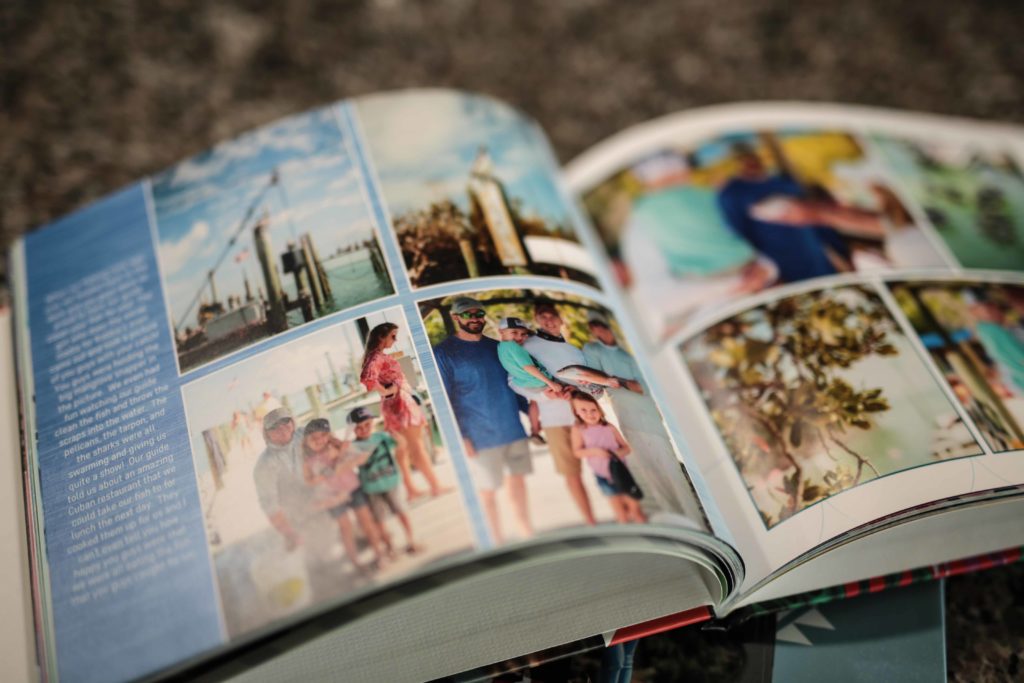
CHOOSE A BACKUP SYSTEM
I’ve done a little research on this topic lately and I actually can’t believe how much I didn’t know about backing up photos. So, maybe this is old news to you, but in case it isn’t… there are two types of back-ups: those that sync and then those that act as an external hard drive. To make this easier to understand, let’s use your phone as an example. If you’re using iCloud as the backup system on your phone, it’s a syncing system. It basically mirrors everything that you have on your phone, which can be awesome and terrible at the same time if you don’t understand this next part. So, say that you have a bunch of photos on your phone that you really love but you’re clearing things out and you delete them off of your phone because you think that they will be saved in the iCloud system… bad idea. Anything that you delete off of your phone will ALSO be deleted from iCloud. You have to always think of iCloud as a mirror image to what’s on your phone. I actually just had some work done on my computer the other day and the technician who was helping me confirmed this info for me and actually said that it’s one of the most common misconceptions with back-ups and that they have tons of people who come in wondering why their important files are gone when they deleted them from their phone because they thought they’d always be in the iCloud system. So, if you do use iCloud, just be aware of this and make sure that you have backups in other places just in case. Could you imagine if your toddler accidentally wiped out your pictures from your phone and iCloud was your only backup… poof, they would be gone!
But there are other options that don’t just sync, which for my brain, makes the most sense. I want a backup system that is just like a huge, safe, puffy cloud that will accept and keep safe anything I throw at it… so in other words, I want a back up system that works just like an external hard drive. I want a backup that I can drag and drop any folder I’d like to it and it won’t go anywhere, even if I delete it off of the computer (or phone) where I did the dragging from. Enter my new favorite back up system: Microsoft OneDrive.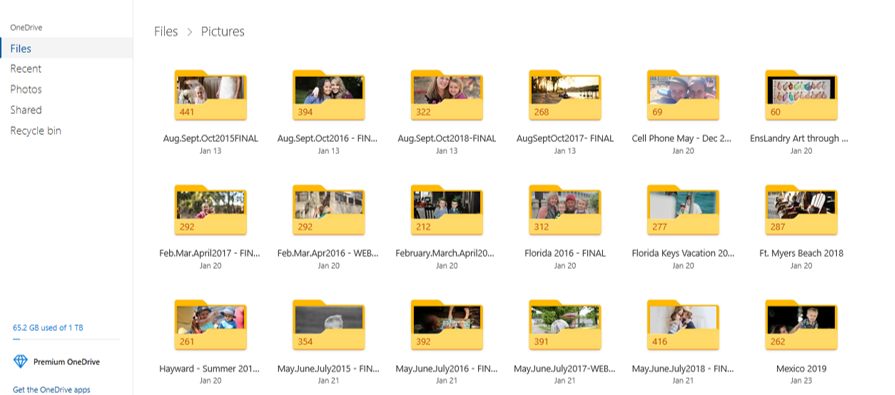
This program is Microsoft’s version of the iCloud system and I just like the way it works and looks. When you get started you are looking at a blank page inside of a “pictures” folder and then you just drag folders right from your desktop into the window and it makes a copy for you. Viola! It keeps your folders exactly how you have them named and organized and it’s visually easy to work with because it’s simple and clean. Depending on how large your file sizes are, you probably want to do this in a place with a fairly strong internet connection. It takes a while for all of the files to transfer, but if you do it in phases throughout a few days it’ll be done before you know it!
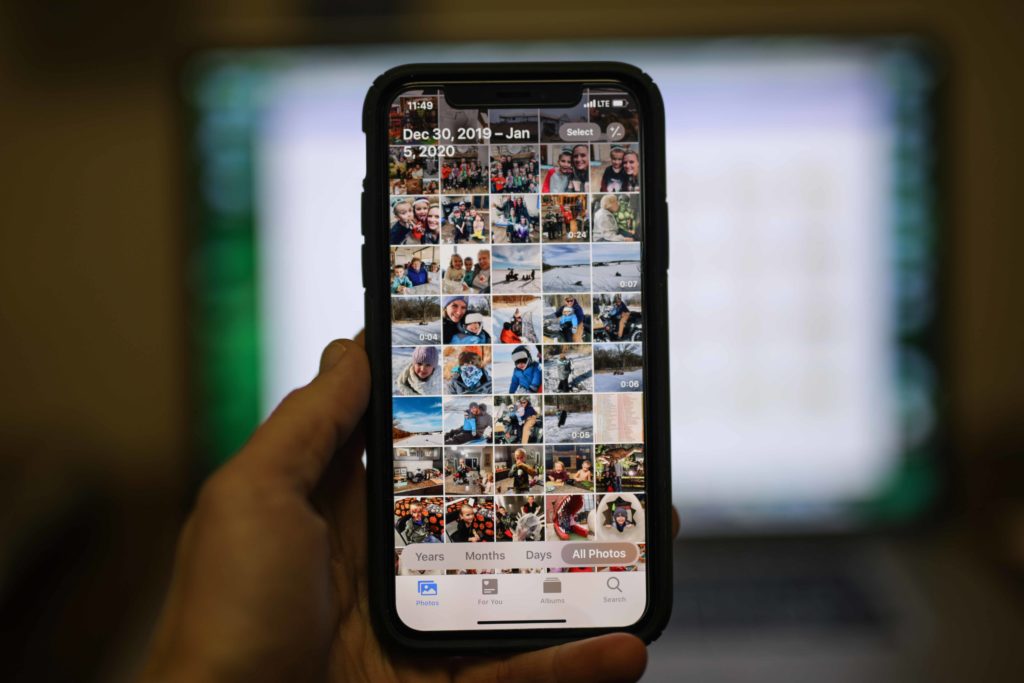
DON’T FORGET ABOUT YOUR PHONE
Ready for the next part? It’s super easy to use OneDrive to back up your phone’s camera roll too… either an Android or an iPhone, both will work. Here’s how to do it with an iPhone:
- Download the Microsoft OneDrive app on your phone
- Go to the Settings and under Files & Photos you’ll find the “Camera Upload” option
- Click here to adjust your preferences (ie: including videos or not, how to organize them, etc.)
- Make sure you have a strong internet connection and let the magic happen
 Side Note: Something that bothered me a little about my phone photos is that I have so many out-takes or ones that I need to go through and delete. I wasn’t sure if I should do that first or not? My advice on this is… for now, don’t worry about it. Just get your images backed up because otherwise that’s one more thing standing in your way of getting this project done. At least clear your mind of the worry: that you could lose your photos. We can worry about cleaning up your camera roll later.
PEACE OF MIND
Okay so once you’ve done the backing up to a cloud system (note: even though other systems aren’t “iCloud,” which is a brand name, they still are referred to as a “cloud system” because of the way they work), give yourself a huge high-five because that is such a big job. But before you go and delete those newly backed-up files off of your phone or computer, consider that you probably want to always have two copies of files – just in case. I like to use an external hard drive as my second form of backup. This means that the only time I delete from my computer or my phone is when I can confidently say that I have those files in 1. the OneDrive cloud system and 2. On an external hard drive. Trust me, it feels SO good to know that you’re covered and that your precious memories are safe no matter what.
Happy Photo Organizing!
Love, Erin